


Why You Should Sealcoat In The Summer
June 3, 2018
Lexington MA Sealcoating Contractor
May 24, 2021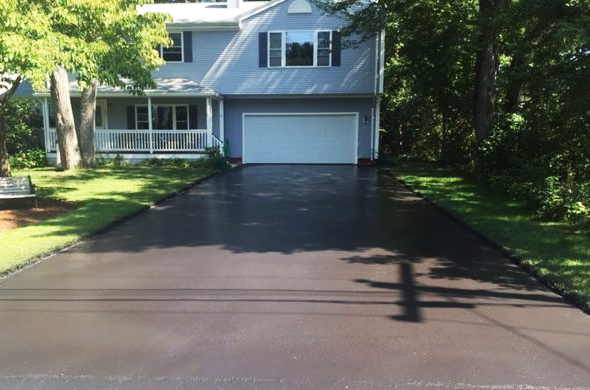
Caring for your newly sealed driveway isn’t just about looks. Once your driveway has been sealcoated, you’ll need to be diligent to make sure it’s properly maintained. Without the right care, your driveway is prone to uneven coverage or serious deterioration.
To combat these issues, we’ve created a list of helpful sealcoating aftercare tips and practices. These are the best actions you can take to help take care of your sealcoating job.
Wait Before You Walk
It doesn’t take much time to sealcoat a driveway. In fact, most of the sealcoating process it spent waiting for the driveway to dry and cure. When my team is wrapping up, our customers often ask, “How long should we wait before walking on the driveway?”
The answer depends mostly on the temperature outside. Heat is a useful component to the curing process. You won’t have to wait as long in the summer. However cooler months require a bit more time.
If you’re not sure how long to wait, use a thermometer and compare the outside temperature to the chart below.
| 60°F and Rising | 24 Hours |
| 50°F and Rising | 36 Hours |
| 45°F and Rising | 48 Hours |
| 45°F and Below | Do Not Seal |
Note: We don’t recommend sealing your driveway in weather under 45°F.
Water The Driveway
Watering your newly sealed driveway is a great way to help cure the sealer. This is especially helpful during the summer, but isn’t as necessary in cooler months. The process should only take about 2 minutes.
How To Water The Driveway:
- Wait until the sun is no longer hitting the driveway—we usually recommend watering the same evening or next morning.
- Use a watering hose to sprinkle the driveway with water.
- Cover at least 80% – 90% of the surface, targeting main walk areas.
Keep It Clean
It’s common for leaves or pine needles to make their way onto freshly sealcoated driveways. If you see some natural debris on your driveway—don’t panic! These new additions won’t cause any long term problems. In fact, once everything dries, the wind will carry most of it away. Anything left can be swept away with a broom.
For long term care, you’ll need to be on the lookout for oil puddles and gas stains. You can prepare by keeping a bag of cat litter on hand. Cat Litter is a wonderfully cheap solution for unexpected spills
Just sprinkle the puddle with litter, wait for it to absorb, and sweep the remaining litter with a broom. In most cases, 70% – 90% of the stain will be absorbed by the cat litter.
Prepare For The Winter
Black ice and slick spots can make driving dangerous during the winter. It’s best to prepare yourself beforehand. That being said, we strongly advise against using common de-icer products on your sealcoated driveway. De-icing chemicals and pellets break down the durability of your driveway by eating away at the sealer.
The best way to protect your driveway in the winter is to use sand. Spread generous amounts of sand across the driveway before the first big snow of the season. Your driveway will essentially become a beach during the cold winter months. This solution provides considerable traction while protecting the sealer from breaking down.
Have More Questions? We’re Here To Help.
Protecting your sealcoated driveway will ensure it’s longevity and help make the most of your investment. We’re standing by to help you meet all of your sealcoating needs. If you have additional questions or want more information about sealcoating, contact us today!